Welcome to Solved radar. Let’s be honest, there is nothing more annoying than when your wifi keeps disconnecting on windows 11 right in the middle of an important Zoom call, a movie, or an intense gaming session. One second you are online, and the next, you see that dreaded “No Internet’” globe icon.
If you are wondering, “Is my router broken?” or “Do I need to buy a new laptop?” stop right there.
In 90% of cases, this is not a hardware failure. It is usually just Windows 11 trying to be “smart” to save battery life, or a corrupted network driver messing things up. This glitch has become surprisingly common after the recent 2026 updates.
Here is our straightforward, no-nonsense guide to fixing your WiFi dropping issue permanently.
Step 1: Stop Windows from Turning Off Your WiFi
This is the number one culprit! By default, Windows 11 is set to turn off your network adapter to save power. It sounds like a good feature, but it often kills your connection when you need it most. Let’s disable this immediately.
- Right-click the Windows Start button and select Device Manager.
- Click the small arrow next to Network adapters to expand the list.
- Look for your WiFi adapter It will usually have words like Intel, Realtek, or Qualcomm Wi-Fi.
- Right-click on your WiFi adapter and choose Properties.
- Go to the Power Management tab at the top.
- Uncheck the box that says: Allow the computer to turn off this device to save power.
- Click OK.
Restart your laptop and see if the connection holds. If it still drops, move to the next step.
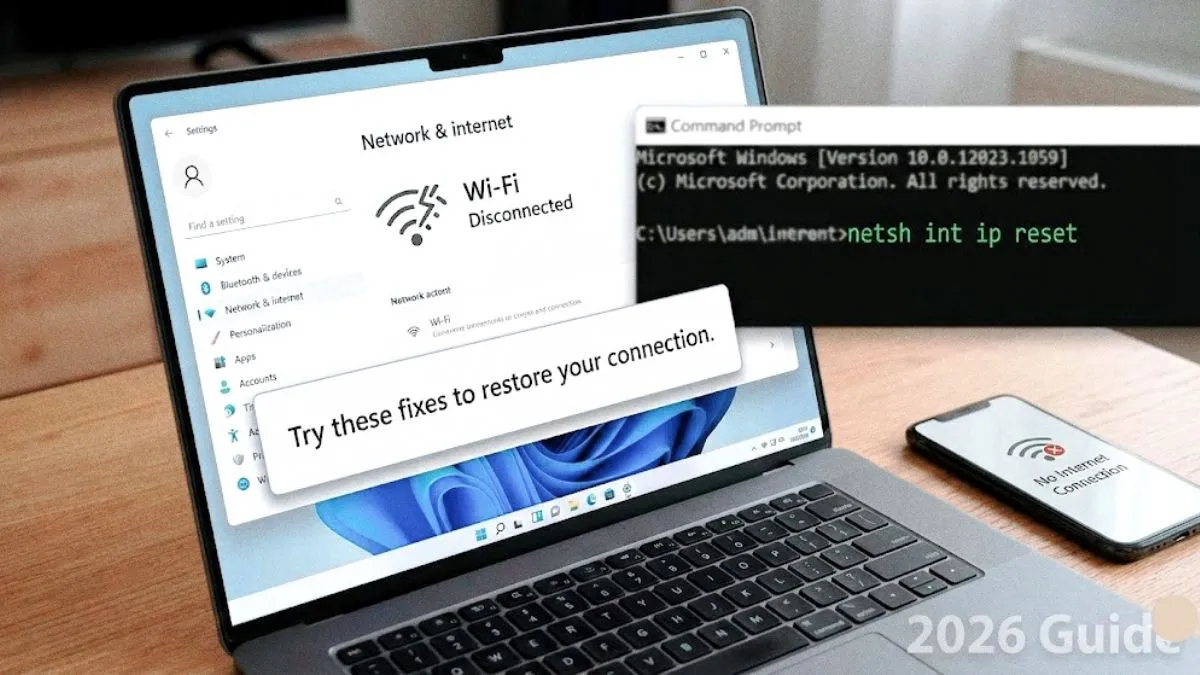
Step 2: The CMD Magic Reset Highly Effective
Sometimes, your network settings get cluttered with old data. Think of this like clearing the junk cache files from your phone, but for your internet connection. We will use the Command Prompt to flush out the bad data.
- Click the Windows Start button, type
cmd. - Right-click on Command Prompt and select Run as Administrator.
- Important: Type the following commands into the black window ONE BY ONE. Do not paste them all at once! Press the Enter key on your keyboard after every single line:
- Type
netsh int ip resetand press Enter. - Type
netsh winsock resetand press Enter. - Type
ipconfig /releaseand press Enter. - Type
ipconfig /renewand press Enter. - Type
ipconfig /flushdnsand press Enter.
Once you see the message “Successfully flushed the DNS Resolver Cache,” close the black window and Restart your PC.
Step 3: Switch to a Faster DNS Google DNS
Your Internet Service Provider ISP gives you a default DNS server, which can sometimes be slow or unstable. Switching to Google’s public DNS acts like a VIP fast-lane for your internet traffic, it is faster and much more stable.
- Go to Settings > Network & internet > Wi-Fi.
- Click on Hardware properties.
- Next to “DNS server assignment,” click the Edit button.
- Change the setting from Automatic DHCP to Manual.
- Turn on IPv4 and type in these exact numbers:
- Preferred DNS:
8.8.8.8 - Alternate DNS:
8.8.4.4
- Preferred DNS:
- Click Save. You might notice websites loading much faster after doing this.
Step 4: Update or Roll Back Your Driver
If this problem started exactly after a recent Windows update, the new driver might be buggy.
- To Update: Go to your laptop manufacturer’s official website (like HP, Dell, Lenovo, or Asus) and download the latest “WLAN” or “Wi-Fi Driver.” for your specific laptop model. Do not rely on the Device Manager’s “Search automatically” button, it rarely finds the newest drivers.
- To Roll Back: If an update broke your WiFi, go to Device Manager > right-click your Wi-Fi adapter > Properties > Driver tab, and click Roll Back Driver if the button is clickable.
The Bottom Line
Connectivity issues in Windows 11 are rarely fatal. Usually, changing the Power Management settings Step 1 or doing a CMD Reset Step 2 solves the problem for good. You don’t need to buy a new router or call a technician. Just follow these steps, and your WiFi should be rock solid again.
Disclaimer: The steps provided in this guide modify your Windows network configuration. Proceed at your own risk. If you are unsure, we recommend creating a System Restore point before making changes.